Google's NotebookLM turns research and notes into professional slides, PDFs, videos and infographics, but free and Plus users will find a "NotebookLM" watermark on all exports. This branding can harm the professional look of your content for formal or business use.
While the official Ultra subscription removes watermarks, it is costly for most users. This 2026 tutorial shows how to remove NotebookLM watermark using 10+ practical methods for videos, slides, PDFs and infographics. We also explain how to use a graph maker to speed up workflows and boost professional visuals.
Does NotebookLM Leave a Watermark?

Yes, NotebookLM adds a visible brand watermark to most exported content, which typically appears as "Created with NotebookLM" or simply "NotebookLM". This watermark acts as a branded label to identify content generated using Google's AI tool.
The watermark shows up consistently across multiple export formats:
-
Slide Decks (PDF/PPTX): Located in the bottom-right corner of every slide. Generated as high-resolution images (via Nano Banana model), the watermark is embedded in the background/image layer and cannot be deleted by simple text selection.
-
Video Overviews: The logo appears in the bottom-right corner throughout the video, with a dedicated NotebookLM ending screen at the end of the exported MP4.
-
Infographics: The brand mark is embedded in the exported PNG images, fixed as part of the final visual.
-
Standard PDF Documents: Visible on every page; during manual conversion (e.g., to Word), watermarks are recognized as separate header/footer images or background elements.
How Do I Remove the NotebookLM Watermark? Official Solution

The only official way to remove NotebookLM watermarks from any exported content is by subscribing to the NotebookLM Ultra (AI Ultra) plan . This is the exclusive, official solution recognized by Google.
Key Details of the Ultra Plan:
-
Pricing: Monthly cost ranges from $125 to $250, depending on usage scale (ideal for commercial or professional users).
-
Watermark-Free Exports: The only plan that removes watermarks from slides, infographics, and PDFs (videos may still include a branded ending screen).
-
Critical Limitation: The slide-level editing feature, introduced in February 2026, does not support watermark removal . Even direct AI prompts like "remove the watermark" will not work, as the watermark is embedded in image/background layers and cannot be selected or deleted via the built-in editor.
There are no other official methods to remove the watermark. Free and $20/month Plus plans will always display the "Created with NotebookLM" brand mark on exports.
How to Remove NotebookLM Watermark From Video?
NotebookLM video exports have two watermark placements: a persistent logo in the bottom-right corner (throughout playback) and a branded ending screen at the end of the MP4 file. Below are the most effective methods to remove both, no Ultra subscription required:
-
Trim the Ending Screen: Use any basic video editing tool to crop or trim the final 3--5 seconds of the video, removing the dedicated NotebookLM ending screen entirely.
-
AI Object Removal: Use video editing tools with AI watermark removal features to detect and erase the bottom-right logo. These tools reconstruct the background seamlessly, avoiding blurs or artifacts.
-
Crop the Video Frame: Slightly crop the bottom-right corner of the video frame (adjusting aspect ratio minimally) to exclude the persistent logo. This works best for short clips where minor framing changes are acceptable.
All methods work for standard MP4 exports from NotebookLM and require no advanced editing skills.
How to Delete NotebookLM Watermark From Slides & PDFs?
NotebookLM exports can come in different formats, and the way you remove the watermark depends largely on whether you're working with slides or PDFs. Instead of using a one-size-fits-all method, it's more effective to apply the right technique for each file type. Below, we'll walk you through simple and practical solutions for both.
How to Remove NotebookLM Watermark From Slides?

When dealing with slide exports, the watermark is usually embedded as part of the visual layer. The goal here is to remove it without affecting your layout or content. Here are a few reliable methods:
-
OCR Conversion: Upload your slides to an OCR-enabled tool to convert image-based slides into editable content. Once converted, you can directly select and delete the watermark layer.
-
Crop & Resize: Adjust the slide canvas size in PowerPoint or Google Slides to push the watermark (often placed in a corner) outside the visible area. Then export the slide again.
-
Shape Overlay: Add a solid-colored shape that matches your slide background to cover the watermark. This method works well in tools like PowerPoint or Canva and is ideal for quick fixes.
How to Remove NotebookLM Watermark From PDF?
PDF files handle watermarks differently from slides, as they are often embedded as background elements or flattened into the document. Because of this, removing them usually requires converting the file into an editable format or isolating the watermark layer.
Here are several practical, tool-agnostic methods you can use:
-
Use Built-in or Standard PDF Editing Features: Open the PDF in an OCR-supported editor to make it editable, then select and remove the watermark directly.
-
Convert PDF to an Editable Format: Convert the PDF to Word or Google Docs. The watermark will usually appear as a header, footer, or background element that can be deleted before re-exporting.
-
Manual Cropping (for Corner Watermarks): Crop the page margins slightly to remove edge-positioned watermarks, as long as no important content is affected.
-
Rebuild the Document from Extracted Content: Extract the content and recreate the file without the watermark for full control over the final result.
How to Remove NotebookLM Watermark From Infographic?

NotebookLM infographics are typically exported as PNG images, with the watermark embedded directly into the visual layer. Since infographics are image-based, most watermark removal methods fall into a few common approaches :
-
AI Background Reconstruction: Use AI-based eraser tools to brush over the watermark area. The tool will automatically reconstruct the background to blend seamlessly with the surrounding design.
-
Image Layer Editing: Open the infographic in an image editor and manually remove the watermark area. This works best when the background is simple or consistent.
-
Crop the Image: Crop the canvas slightly to remove watermarks placed near the edges, ensuring the main visual content remains intact.
-
Recreate the Infographic: Rebuild the infographic using the original text or data. This method takes more time but gives you full control over the final layout without any embedded watermark.
Streamline Post-Editing Workflow With Diagrimo

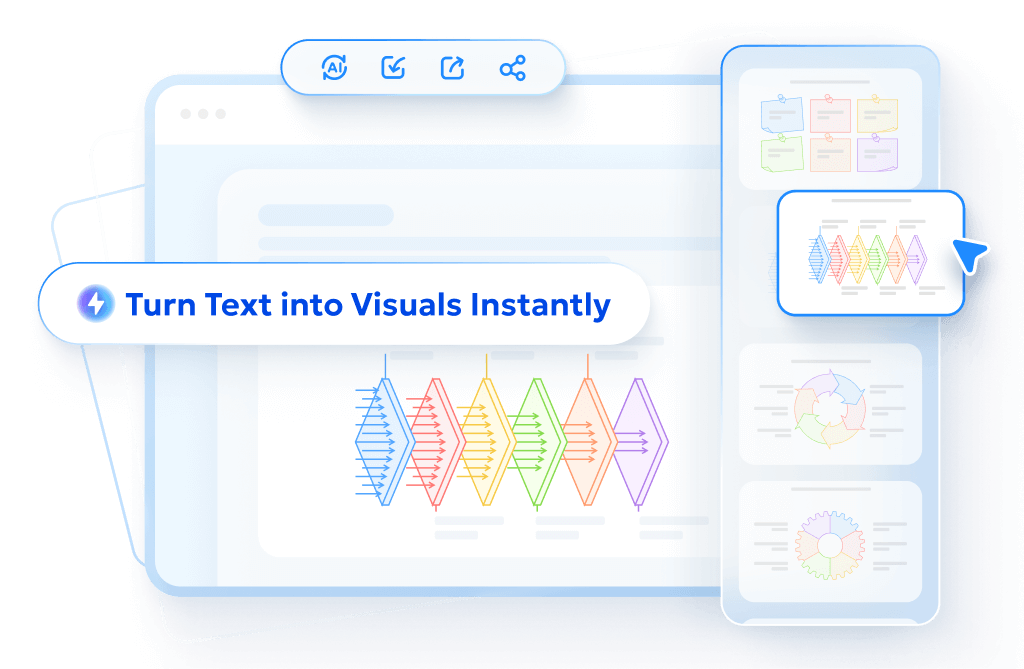
Removing watermarks is only one part of improving your final output. If you also want to make your content more visual and presentation-ready, tools like Diagrimo can help transform text into structured graphics quickly.
With its text-to-visual capabilities , you can quickly transform NotebookLM summaries and key points into structured diagrams such as funnels, pyramids, fishbone charts, and bullseye graphics. By simply pasting your text or entering a short prompt, you can generate clean, well-structured graphics within seconds, without the need for manual design work.
In addition to speed, Diagrimo also focuses on output quality and flexibility . It produces high-definition images and PDFs while still allowing you to easily adjust colors, layouts, and text to match your branding or design preferences.
More importantly, it fits naturally into your existing workflow , helping you turn cleaned NotebookLM content into high-quality visuals without adding extra complexity.
Conclusion
If you've been asking how to remove NotebookLM watermark efficiently and affordably, this article has covered all the solutions you need, giving you reliable ways to erase watermarks from slides, PDFs, videos, and infographics without relying on expensive subscriptions.
If you also want to make your content more visual and presentation-ready, tools like Diagrimo can help transform text into structured, professional diagrams.
By combining these approaches, you can not only clean up your NotebookLM exports but also present your ideas more clearly and effectively, keeping your final work both polished and professional.
- AI text-to-visuals turns ideas into diagrams or infographics.
- Customizable styles match your brand and presentation tone.
- Share anytime by exporting in various formats and a link.
- No design skills needed for presentations, teaching, or reports.
FAQs
-
How to Remove NotebookLM Watermark on Canva?
-
How to Remove NotebookLM Watermark Online Free?
-
How to Remove NotebookLM Watermark From PPT?
-
Is Removing NotebookLM Watermark Legal?
-
Can NotebookLM's Built-in Editor Remove Watermarks?
Upload your NotebookLM PDF or slide to Canva. In most cases, the watermark becomes a separate layer that you can select and delete directly. For stubborn embedded watermarks, use Canva's Magic Eraser tool to brush over the logo. Canva's AI will automatically reconstruct the background. You can then redesign or download the watermark-free file.
Use free browser-based watermark remover tools designed for PDFs and images. Simply upload your NotebookLM export, let the tool automatically detect and erase the watermark, then download the cleaned file. Note that for sensitive documents, online uploads may pose privacy risks.
Export NotebookLM content as PPTX, then open it in PowerPoint or Google Slides. Use OCR to convert image-based slides into editable elements. You can also crop the slide to hide the watermark, cover it with a matching shape, or use built-in AI editing features to remove the logo.
According to Google's terms, users own the content generated within NotebookLM. Manually removing the watermark for personal, professional, or commercial use is generally considered legal and compliant, as long as you do not misuse the tool or violate content ownership policies.
No. The slide-level editing feature introduced in February 2026 allows users to edit individual slides, but it cannot remove watermarks. Commands such as "remove the watermark" do not work, as the watermark is embedded in the background or image layer and does not support direct object selection.
