Google NotebookLM has quietly become one of the most useful free AI research tools out there, and its mind map feature makes it even more powerful. Whether you are a student trying to break down a dense paper, a professional making sense of a long report, or a researcher navigating complex literature, the NotebookLM mind map gives you an instant visual overview of your source material.
This guide covers everything you need to know: what the mind map feature does, how to generate and share one, how to work around its editing limitations, and which tools can help you extract and customize your maps further.
What Is Mind Map in NotebookLM
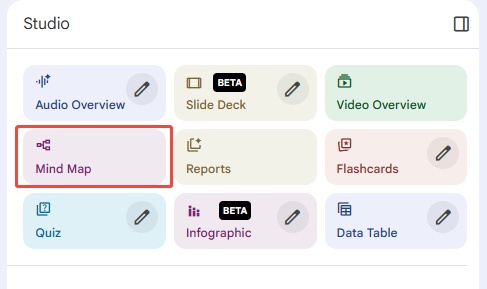
The mind map in Google NotebookLM is an AI-powered visualization tool that automatically analyzes your uploaded sources and generates a branching diagram of key concepts and their relationships. You will find it inside the Studio panel on the right side of the interface, alongside other output types like Audio Overviews, Slide Decks, and Reports.
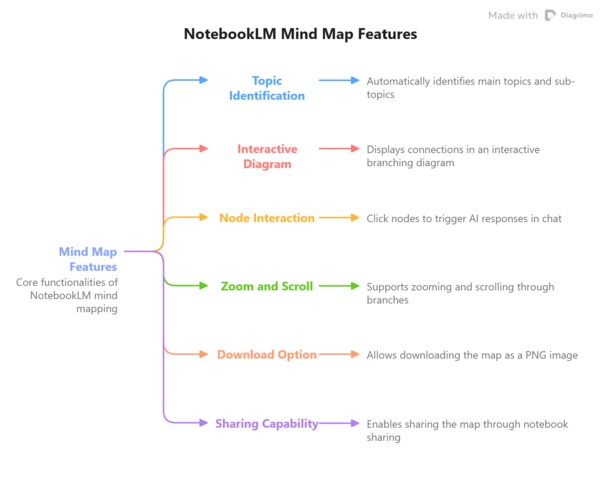
What the NotebookLM mind map feature can do:
-
Automatically identifies main topics and sub-topics from your sources
-
Displays connections between ideas in an interactive branching diagram
-
Lets you click on any node to trigger a follow-up AI response in the chat
-
Supports zooming, scrolling, and expanding or collapsing branches
-
Allows you to download the map as a PNG image
-
Enables sharing the map by sharing your notebook with others

NotebookLM generates mind maps strictly from your uploaded sources. It does not pull information from the internet, which makes it reliable for source-grounded research.
How to Use NotebookLM Mind Map
Getting started is straightforward. Here is a full walkthrough, including how to generate, download, and share your map.
How to Create Mind Map in NotebookLM
-
Step 1: Open or create a notebook
Go to notebooklm.google.com and open an existing notebook, or create a new one and upload your sources. NotebookLM supports PDFs, Google Docs, websites, YouTube links, and plain text.
-
Step 2: Generate the mind map
In the central chat panel, click the Mind Map chip at the bottom. You can also find it in the Studio panel on the right. NotebookLM will process your sources and render the map directly in the Studio panel.
-
Step 3: Explore the map
-
Zoom in and out using the controls in the bottom right corner
-
Expand or collapse branches by clicking on nodes
-
Click any node to get an AI-generated summary in the chat panel
-
Ask follow-up questions directly from the mind map view
How to Download the NotebookLM Mind Map
-
Open the mind map in the Studio panel
-
Click the Download icon in the top right corner of the mind map window
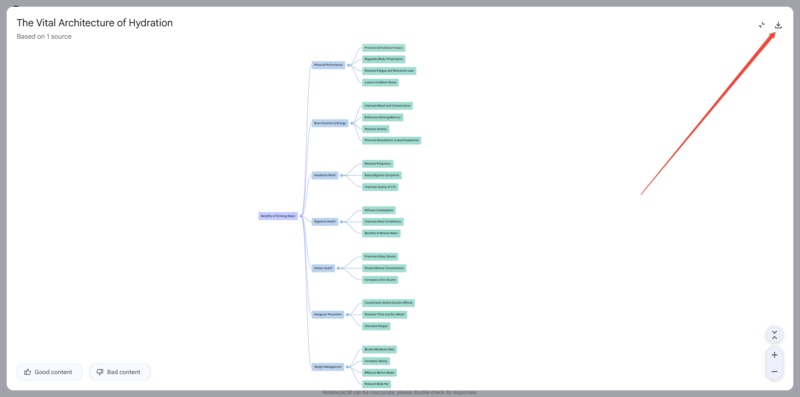
The map will be saved as a PNG file to your device
 Note:
Note:NotebookLM only exports mind maps as PNG images. This is a static file and cannot be edited after download. If you need an editable format, the tool section below has you covered.
How to Share the NotebookLM Mind Map
There are two options:
-
Share the notebook: Go to your notebook settings and share access with another user. They will be able to open the same mind map in their own Studio panel.
-
Share the image: Download the PNG and share the file directly via email, messaging apps, or any platform you prefer.
-


Turn Any Text into a Visual Mind Map with Diagrimo

One of the most common frustrations with NotebookLM is that once your mind map is generated, you cannot edit it. You can view it, download it, and click through it, but you cannot rename nodes, change the layout, adjust colors, or restructure branches. For a lot of users, that is a real limitation.
Here is what NotebookLM mind maps currently lack:
-
No text editing inside the map
-
No color or style customization
-
No ability to add, remove, or rearrange nodes manually
-
No way to build a mind map from scratch
This is where Diagrimo comes in. Diagrimo is an AI-powered mind map tool built specifically for creating and customizing visual diagrams. It gives you the flexibility that NotebookLM simply does not offer.

What Diagrimo Can Do
Once your map is generated, you can edit every element: rename nodes, adjust branch colors, switch styles, and reorganize the structure. It is a natural next step for anyone who wants to move beyond the read-only experience of NotebookLM and build something they can actually work with.
Diagrimo pairs well with NotebookLM. Use NotebookLM to extract key ideas from your sources, then bring those ideas into Diagrimo to build a fully editable, presentation-ready mind map.
How to Edit NotebookLM Mind Map
NotebookLM does not offer built-in editing for mind maps. That said, there is a practical workaround that lets you edit the text within a downloaded mind map image using Canva's Magic Studio feature.
-
Download your mind map from NotebookLM as a PNG file using the Download icon in the top right of the mind map window.
-
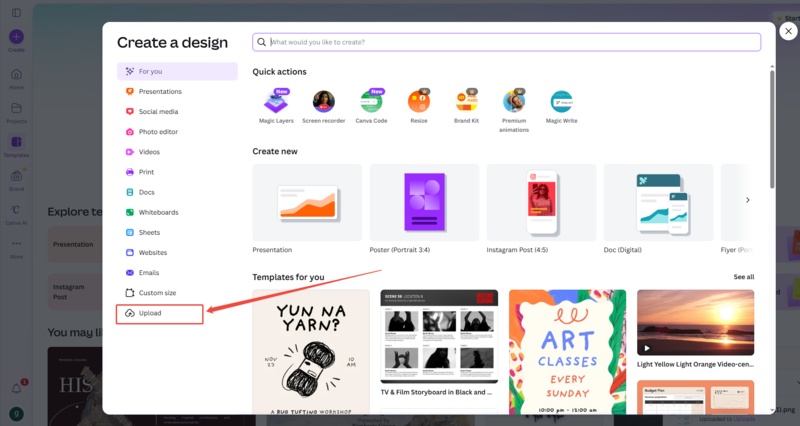
Log in to Canva and click Create. In the panel that opens, select Upload and upload your PNG file.
-
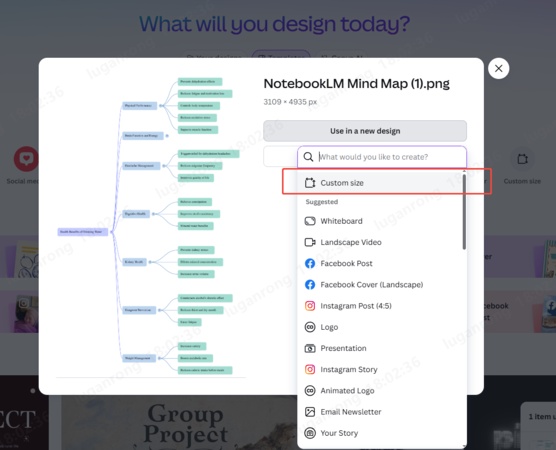
Click "Use in new design" on the uploaded image and select Custom size to enter the editing canvas.
-
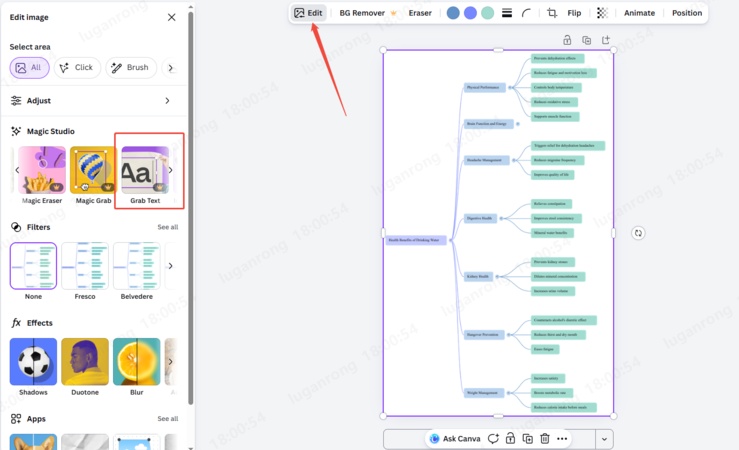
Select the image on the canvas. In the top toolbar, click Edit. Scroll to the Magic Studio section in the left panel and select Grab Text.
-
Canva will highlight all text blocks in purple. Click on any block to edit the text directly within the mind map layout.
-
When you are done, click Share in the top right and download the final version of your edited mind map.


This method works well for minor text corrections or label edits. For full structural changes like adding nodes, changing the layout, or rearranging branches, consider using Diagrimo.
Best NotebookLM Mind Map Extractor Tools to Try
Because NotebookLM only exports mind maps as PNG images, a number of third-party tools have emerged to help users extract and repurpose mind map content in editable formats. Here are the most useful ones available right now.
How the Chrome Extension Workflow Works
-
Install the NotebookLM Mindmap Extractor or MindMap Exporter from the Chrome Web Store
-
Open your notebook and generate a mind map, then expand all branches so the full structure is visible
-
Click the extension icon and hit Detect Mind Map. The extension reads the map structure directly from the page
-
Select your preferred export format and click Export Mind Map. The file will download to your device
-
Import the file into XMind or another compatible tool to edit, restyle, and customize the map
Final thoughts
The NotebookLM mind map is a genuinely useful feature for quickly getting a visual overview of complex source material. It is free, grounded in your actual documents, and fast to generate. The editing limitations are real, but with the right NotebookLM alternative mind map tools alongside it, such as Canva for quick text fixes, Chrome extensions for XMind export, and Diagrimo for fully customizable AI maps, it becomes a much more complete workflow.
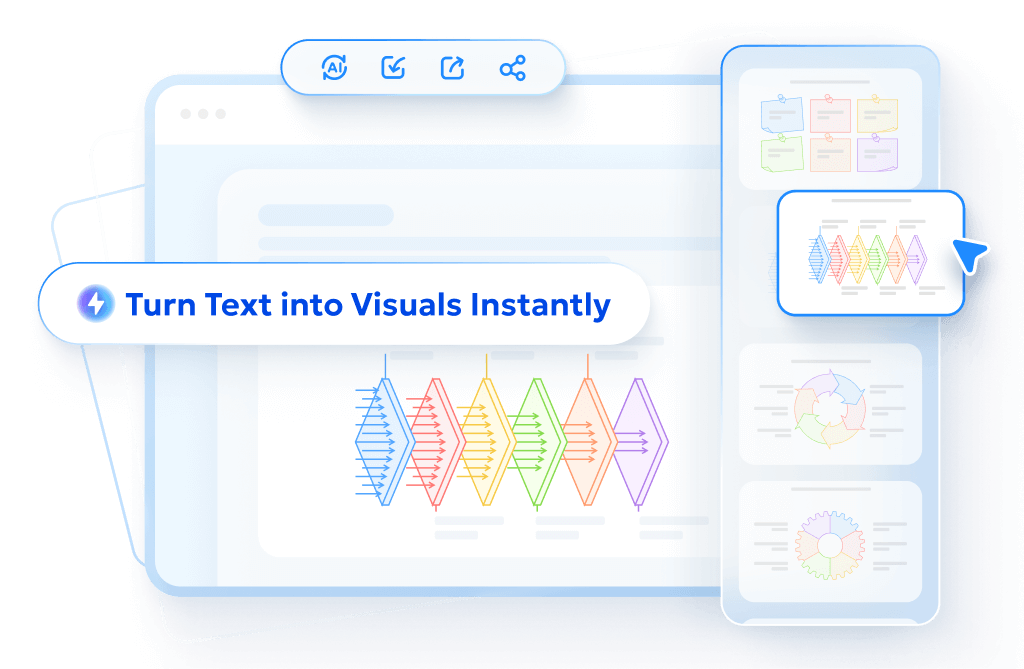
- AI text-to-visuals turns ideas into diagrams or infographics.
- Customizable styles match your brand and presentation tone.
- Share anytime by exporting in various formats and a link.
- No design skills needed for presentations, teaching, or reports.
FAQs
Is the NotebookLM mind map free to use?
What is the best free mind map software?
-
What should I do if the mind map is not showing in my account?
Can I export a NotebookLM mind map to XMind?
-
Is the NotebookLM mind map available in the mobile app?
-
Can I use a NotebookLM mind map extractor Chrome extension for free?
Yes, it is available on both free and Plus plans.
Diagrimo is a great free option. You can paste in your own text to generate a visual map, or use the AI to build one from a topic prompt. It also supports editing, color customization, and multiple export formats.
Try refreshing the page or switching to a different browser. Make sure you are on the web version, as the mobile app does not support this feature.
Not directly from NotebookLM. Use the NotebookLM MindMap Exporter Chrome extension, then open the result in XMind for editing.
No, it is only available on the web version at notebooklm.google.com.
Yes, the main extractor extensions listed in this guide are all free to install and use.
